
How to do Tapestry crochet – Pictures and a Free Coaster Pattern
Please note, some of the links in the text below are affiliate links, which means that if you decide to buy any of their products or services, I’ll receive a small commission. It helps me to maintain my blog, support my family and allows me to continue to create free content. I only recommend products that I use and love. Thank you for your support. For more details click the disclosure
Tapestry Crochet is a trending topic! It’s a crochet technique that never goes out of style and creates the most beautiful patterns and designs.
I was looking for something special to create for my sister’s thirtieth birthday, and I fell in love with Tapestry crochet. I think I like it even more than amigurumi. (Can you believe it?)
You can use this technique in all kinds of crochet projects like blankets, pillows, bags, baskets, and many more.
I loved learning this technique and will share useful tips and tricks with you below!
This tutorial also includes a Free Pattern. You can make an adorable coaster with a heart in the middle.
Tapestry crochet is a technique that is used all over the world. If you’re familiar with the basics of crochet stitches, then I am certain, you can learn this great technique too. You can make gorgeous patterns that look great on the outside as well as the inside. The Tapestry crochet technique is reversible!
Supplies:
- 3.00mm Crochet Hook (USA – D)
- #4 Aran Yarn in two colors (I used Paintbox Yarns Simply Aran) – You can use different types of yarn, just adjust the size of the hook.
- Yarn Needle
Aran weight yarn is sometimes known as heavy worsted weight or 10ply. The recommended hook size is 5 mm, but for tapestry crochet, I suggest you use a smaller size. For this project, you can also use a 3.5 mm hook (USA – E).
The Paintbox Yarns are amazing for Tapestry Crochet. The choice of colors on offer in Paintbox Yarns’s Simply Aran range is astonishing! This soft, yet durable, yarn is fantastic value for money, and with 60 colors to choose from you’ll be sure to find your perfect shade!
Abbreviations:
- CH ~ Chain
- SC ~ Single Crochet
- SL ST ~ Slip Stitch
- RS ~ Right Side
- WS ~ Wrong Side
- MC ~ Main Color
- CC ~ Contrast Color
- ST(S) ~ Stitch(es)
- FO ~ Finish Off
Gauge:
4″ x4″ square (10×10 cm) /3 mm-(D)Hook/ Single Crochet/ #4 Yarn
• 20 Rows x 18 Stitches
Size:
• 4” x 3.5” (10×9 cm) Rectangle
Notes:
-
-
-
- Every block of the graph represents one SC.
- I suggest using a smaller hook than recommended to minimalize the show-through of the contrasting color.
- This pattern includes written instructions and the graph.
- You start your work at the right bottom side.
- At the end of the row, when you crochet on the WRONG site, you carry your contrasting color yarns in front of the single crochet, and when you crochet on the RIGHT side, you do it in the back. (Pictures in the step 3)

Step 1 – Introducing the Contrasting color:
You start your work with the foundation chain. You chain one more than the number of sc in the graph. For example, if the pattern requires 20 sc, you chain 21.
You introduce the contrasting color (CC) here [1] and make your first sc in the second chain from the hook. It may look a little tricky, but when you make the first few SC [2], then it will go smoothly. You SC over the CC. It is essential to introduce CC in the first row so that the thickness of the final product is the same all over. [3]


Step 2 – Changing the color:
Continue making main color (MC) stitches until you come to the SC just before the first color change.
Work that last MC SC until you have two loops on your hook [5]. Bring your MC forward over the top of the CC and complete the ST with the CC by yarning under and pulling CC through the two loops on your hook [6]. You make the next SC normally with orange yarn over the yellow [7].


Now continue working with the CC yarn the number of SC required in the same manner as illustrated previously.
When you come to the SC just before the color change back to the MC, Work that SC until you have two loops on your hook. Bring your CC forward over the top of the MC and complete the ST with the MC by yarning under and pulling MC through the two loops on your hook.

Continue reading that row of the graph or written instructions, making color changes as necessary, until you reach the end of the row.
Notes:
- You start your color change on the SC just before the color change.
- Remember to maintain tension. When pulling through with the new color, the stitch you just completed will lose tension. Be sure to correct it before moving on.
- Be sure that you remember to yarn under when pulling through with the new yarn.
- When working with the two or more colors at the same time, it’s essential to check both sides of your work periodically throughout the row to see if there is any bunching or puckering. I suggest you do this right before the color change. If you see the non-dominant yarn sticking out, give it a gentle tug and then gently stretch out the row again to even out the stitches and smooth out the row.
- Remember that each row of the graph alternates between following it {Right to Left} and {Left to Right}. Be sure to stitch accordingly. I like to highlight each row or SC in the written instructions as I complete it so that I can easily visualize which SC is following next.

- I like to count my stitches right before the color change to check if the number is correct. It is a little time consuming, but I think it is better than to do it all again.
Step 3 – The end of the row:
At the end of your row, CH 1 [11] and turn your work using only the yarn with the color you start your next row. Then carry the CC under the first ST [12] of the next row and continue onward as specified in the graph. [13]


Throughout the project, be sure to carry your CC around on only the WS.


In the example, the red yarn is visible on both edges as I carried it into the next row. [10]

The finished project looks nicer if the ˝carry over˝ yarn is only on one side. You will hide it under the border later.

Or, if you are making a pillow, it will hide once you sew the two panels together.
Step 4 – The Pattern:

Here are the written instructions:
First you chain 21, you start your SC in the second chain from the hook and introduce the red yarn.
← Row 1 [RS]: (yellow) x 20
→ Row 2 [WS]: (yellow) x 20 (you start crocheting the Wrong Site, that means you carry your red yarn in front of the work. – See step 3)
← Row 3 [RS]: (yellow) x 9, (red) x 2, (yellow) x 9 (You start the Right Site, you carry your red yarn in the back.)
→ Row 4 [WS]: (yellow) x 8, (red) x 4, (yellow) x 8
← Row 5 [RS]: (yellow) x 7, (red) x 6, (yellow) x 7
→ Row 6 [WS]: (yellow) x 6, (red) x 8, (yellow) x 6
← Row 7 [RS]: (yellow) x 5, (red) x 10, (yellow) x 5
→ Row 8 [WS]: (yellow) x 4, (red) x 12, (yellow) x 4
← Row 9 [RS]: (yellow) x 3, (red) x 14, (yellow) x 3
→ Row 10 [WS]: (yellow) x 2, (red) x 16, (yellow) x 2
← Row 11 [RS]: yellow, (red) x 18, yellow
→ Row 12 [WS]: yellow, (red) x 18, yellow
← Row 13 [RS]: yellow, (red) x 18, yellow
→ Row 14 [WS]: yellow, (red) x 18, yellow
← Row 15 [RS]: yellow, (red) x 18, yellow
→ Row 16 [WS]: yellow, (red) x 18, yellow
← Row 17 [RS]: (yellow) x 2, (red) x 7, (yellow) x 2, (red) x 7, (yellow) x 2
→ Row 18 [WS]: (yellow) x 3, (red) x 5, (yellow) x 4, (red) x 5, (yellow) x 3
← Row 19 [RS]: (yellow) x 20
→ Row 20 [WS]: (yellow) x 20Congratulations, the hardest part is over!
Now all you have to do is make a border. It is not necessary, but it gives a pretty finished look. In the picture below you see it without the border.

I have made a Crab stitch around it. It is also called The reverse single crochet.
Step 5 – The border:
I always like to start and finish my patterns with one or two rows of the SC in the MC. When you complete the design, it is safe to cut the CC yarn. It will not get loose.
With the MC, you crochet one round of SC all the way around. At the sides, you put one SC in each row, and at the corners, you crochet three SC in the same stitch.
When you come all the way around you SL ST into the first SC, and FO. But only if you want to make the Crab stitch with a different color.

I want to make the Reverse single crochet with CC.
The actual mechanics of a reverse single crochet stitch are the same as for regular single crochet — except in reverse.
Instead of working from right to left, you work from Left to right. It creates a somewhat twisted, rounded edge that’s good for making a simple finished edge for your work.
Be sure to have the right side of your work facing you.
- Insert the hook, from front to back, in the next stitch to the right. Yarn over (yo) and draw the yarn through the stitch. (This step is similar to how you work regular single crochet — only backward.)
- Yarn over and pull the yarn through the two loops on the hook.
One reverse single crochet is complete.
Repeat the preceding steps in each stitch across the row.
To complete your crab stitch border, stop when you’ve reached the stitch you started in. Instead of adding a crab stitch in that starting stitch, slip stitch into the same stitch you started in.
Cut your yarn and pull through. When you weave in your ends, you’ll want to weave the tail through the stitches to the right.

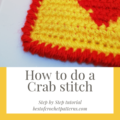
For more detailed instructions with pictures, read How to crochet a Crab Stitch – Step by Step Tutorial
I hope you find the article useful.
You can Pin it for later.

-
You can follow me on Instagram here. (Follow me for the latest news, sales, and Giveaways)
You can follow me on Facebook here.
You can also follow me on Pinterest here.
Find my Etsy Shop here: PrettyThingsByKatja
My website with Free Patterns here: Prettythingsbykatja.com
My VIP Membership here: VIP Pretty Things By KatjaIf you have any questions, you can ask them in the comments below or contact me on Instagram, and Facebook.
Have a beautiful day, and enjoy crocheting.
Katja
-


Great topic! I have wanted to learn about crocheting for awhile. My grandma used to do so well. This is a great hobby to do to keep our minds focused and to relax. Thanks for sharing this information on how to do tapestry crochet. I will be bookmarking this website for later referencing.
Thank you. I am glad you enjoyed it. Crochet really does keep your mind focused, especially Tapestry Crochet, because you need to count your stitches. I find it relaxing to focus on one thing only.
If you will need any assistance when you crochet, feel free to contact me and I will do the best I can to help you.
Have a nice day.
Hei.olisi kiva jos tuon kuvion saisi video linkkinä,helpottaisi vielä enemmän.kiitos
Hi. Thank you for your comment, you have a lot of helpful videos on YouTube. I hope I have helped. Have a beautiful day, and enjoy crocheting. Katja
I remembered last year valentine’s day when I wanted to present the tapestry crochet to my love I decided to do it myself but I unfortunately I made a mistake in the first step you made so it spoilt all the work even though I finished it but doesn’t really looked like what I wanted but seeing this post ll help me in making another one and perfect it up thanks for this post and with a good recommendations also thanks alot
Thank you. I am glad you find it useful. It really sucks when you put so much time and energy into one project, and then it doesn’t turn out good. I know how you feel. But you did learn something new, and now you know where you made a mistake.
If you need any help, feel free to contact me. And if you like, you can post your creation on my Facebook page. You can post even the one with a mistake. I am gathering a supportive community, and we will help you learn. It may also help others.
Have a beautiful day, and enjoy crocheting.
I used to believe crochet was a grandma thing, just until I tried myself and saw how relaxing and intriguing it can be.
I am just developing coordination to try harder techniques and patterns, and so here I want to thank you coz your blog is helping me a lot in this direction.
I will buy my some new nice colors and give this heart shapes a try!
Thank you, I am so glad you like my blog.
When I started to crochet, I was making scarves, but the more I got into the world of crochet, the more different patterns I discovered. You really can make anything.
If you need any help, feel free to contact me. I would love to see your creations. If you want, you can post it on my Facebook page.
Have a beautiful day, and enjoy crocheting.
I am more a knitting lover but have recently started to do some crochet work. This technique looks like it could be fun and I love the heart pattern that you have provided. I am going to try and make some cute coasters using this pattern.
I find that when I crochet my hands get tired quickly. They get stiff and sore. This is the only thing that puts me off as with knitting I never get sore. Is this normal or am I doing something wrong?
Hi. Thank you for your comment. Maybe the problem is the hook you are using. My hands use to hurt too, but now I use these hooks https://amzn.to/2CSRVHq and it really makes a difference. They are a little on the expensive side, but if I can crochet longer without the pain, I think it is worth it. It also helps to stretch your hands every now and then.
I hope I helped you. With this Heart patterns, you will not have problems. It is very quickly made. 🙂
Have a beautiful day. And if you want, you can post your creations on my Facebook page, I would love to see it.
Thank you.
Your article is very interesting and useful for my wife. When she was younger she was involved with embroidery and knitting. Would love to see this article to see your technician and I’m sure she will be excited. She would like to crochet a scarf for our little daughter whenever I think your technicians will help her. As a man I find it interesting but difficult.
Thank you. It is nice of you to help your wife like this, I am sure she will be happy to see you found something she likes on the internet. Maybe she will crochet something nice for you too 🙂
Have a nice day.
I am impressed with your step-by-step instructions on crocheting, I was curious would this be the same for people who are left-handed? Being a retired man I am looking for hobbies to spend my free time, do you think this would be a good hobby for a man or is it more suitable for women?
Jeff
Hi Jeff. You can do tapestry crochet it you are left-handed. You just need to look at the graph from left to right. Here is a website to help you with it: Carolventura.com it also has some great pictures.
I think men can crochet; it absolutely isn’t just for women. There are some famous men that crochet and make a good living with it. You can make such different stuff, some quite manly. I also think that if a man crochets, it can be more interesting for the public and can sell more of his creations just because of the publicity. If you think you would enjoy making things from yarn with your hands, then try it. 🙂
If you need any assistance, contact me, and I will help you.
Have a beautiful day, and enjoy crocheting.
Hi Katja. The last time I did crochet has been so many years ago when I was in secondary school. We were taught how to do it in a practical class; I fell in love with it and I began practising myself. I even made a school bag and a cap then. It was exciting and fun back then. I doubt if I will be able to do it again. Nice tutorial. 😊
Thank you very much for your comment. I am sure if you try you will fall in love with crocheting one more time. There are a lot more patterns available now, especially on youtube. You can also refresh your memory with my How to crochet step by step tutorial 🙂
If you decide to make something, I would love it if you would share it with me on my Facebook page.
Have a nice day.
You are really cool, amazing and hardworking. I love the way you arranged the steps with the pictures for this tutorial. Kudos!
I was wondering if you would consider opening a YouTube channel so you can make these tutorials in video format. Videos are better to understand and by the way, I think crotchet videos will do well in YouTube. All the best,
Good vibes!
Thank you so much. I am considering to have my own YouTube channel; I just didn’t come to it yet. I agree it is easier to understand with a video. I will do my best and make one as fast as I can. Thank you for your suggestion.
Good vibes to you too 😉
Hello Katja!
First of all, the tapestry from the upper picture is featuring such wonderful colors!
The tutorial is welcome and useful for people that are handmade-talented and good at making crochets. If my grandmother (she was of Russian origin) had still been alive and in her powers, I am sure she would have been interested about learning new techniques about crocheting and yarns. She was very talented at crocheting clothing pieces (I cannot tell about tapestry). This is a work that requires much dexterity, patience, attention, ambition, and to put it into a single word – simply passion! The satisfaction and the beauty of the results are worth it.
Have good luck with further patterns and keep up the good work!
Peter
Thank you so much 🙂 I learn Russian because there are so many beautiful patterns made in the Russian language. I even did a post, where I help people to translate patterns from Russian to US terms. 🙂
I agree, if you want to sit for hours and do this kind of crafts, you need passion and love for creating things with your hands.
Have a beautiful day and thank you for your comment.